Showing posts with label diy. Show all posts

Thursday, July 25, 2013

Top 20 Tips for Selling at Craft Shows & Flea Markets


Most vintage sellers and upcyclers / repurposers (like me) participate in flea market type shows. I only do about 2-4 shows per year, but other sellers often do 1 show per month. These shows can be very profitable, but they require a lot of work. Here are some tips that I try to follow to make these events run smoothly.

1. Have a plan - I normally start planning a month or more in advance for what I am going to sell and how I want me booth to look.

2. Get organized - Get everything tagged / priced and packed the night before.

3. Have an attractive display - This does not mean that it needs to be organized to the T or need to have expensive props. But if the customer doesn't want to look at what you have then they won't come over and make a purchase.

4. Have a balanced sellers personality - You need to be friendly, but your mind needs to be on making the sale. Don't be overly loud and aggressive because that will scare the seller away. Be sure that if you have room to come down on the price, then accept the buyers offer.

5. Be nice - You want to make sure that you are engaging and polite. Many people will make a purchase based on your interaction with them.

6. Change your display - If you are selling the same item at each show / event then make sure to change your display. If you display is the same every time people may get board and not stop by. You want your buyer to be excited about your product, want to look at it, and want to purchase it.

7. Restock and have new merchandise - If you are participating in a 2 or 3 day show make sure that you have plenty of inventory that you have bring out as the days go by. Having a trailer or U-Haul is important.

8. Sell what people want - I already know what you're thinking "how do I know what others are going to want?" Well after doing a few shows you will start to see what people are buying, especially if you have done the same show more than once. I can tell you that at smaller flea market / vintage type events smaller items are better. If you are at Alameda or a LARGE show then larger items might sell better.
 
9. Price reasonably - Don't be greedy -  Make sure to price your item with a profit, but you cant expect that your buyer is going to pay through the roof when they can get it two spaces down for less.

10. Advertise - Most shows / event hosts will advertise, but that doesn't mean that you cant do a little of your publicity. But an add on craigslist or contact the local paper.

11. Social Media - This goes along with advertising - post sneak peeks and event info on twitter, facebook, instagram, etc, etc. Using social media might get you sales before you even get to the event!

12. Enlist the help of your friends - You cannot do a vendor show by yourself...YOU WILL NEED HELP! Plus its always more fun when you have someone to talk too! And that way you can shop!

13. Get there early - There is nothing worst then getting stuck in a line of cars and cargo vans all trying to get to their spaces and get unloaded...so get their early!

14. Be flexible and embrace change - Nothing every works out exactly like we think it will, so be flexible and embrace changing the plan or changing the design.

15. Take notes - Take notes along the way. Whether it be about what other vendors are doing, what you want to change the next time, or what you might learn from talking to customers and other vendors.

16. Keep good records - You want to make sure that you are keeping track of your sales. You want to do this so you know what's selling, how you are making, and in case their is a problem. I use The Square and sometimes its a little finicky so I always keep a note pad with the customers name and the amount of purchase just in case.

17. Have business cards - You don't want to have stacks of them laying out everywhere because you pay for them and it adds to the bottom line, but if you want people to call you or find your shop / Etsy then give them a card. I also give keep customer that purchases a card.

18. Use a canopy or pop-up tent - This will protect you and your buyers from the weather and give your space a more store like feel. You don't want you buyers dying in the heat or getting wet if its raining.

19. Signage - You want to make sure that you have a sign clearly showing your name or company name so people remember you. Have repeat customers at an event is very important and since you might now always get the same space you need to have signage.

20. Have FUN!

Thursday, July 11, 2013

Not Enough Hours in The Day

I don't know about you, but summer is always one of the busiest times for me. There are just not enough hours in the day. Today is a perfect example, non stop go since 9 a.m. and here I am at 11 p.m. writing this blog post. And I still have some pictures to take of my sneak peek for my 1st Instagram Sale. The weekends are no better because we are off having fun with family and friends.

The good news is that my family and I are having tons of fun! And next week and weekend we will be camping with more of our family - in-laws and cousins! Pictures to come.
I could really use some tips on how to stay a little more organized and to increase my time management so I can get more done during the day (A.k.a nap time).
 
 
If you want to follow along or see whats for sale in my Instagram sale @ thehouseofdiyshop - find me personally on Instagram @ houseofdiy.


Monday, July 1, 2013

Easy and Chic Flour Sack Hand Towels

Super Easy and Chic Flour Sack Hand Towels
I can never have enough hand towels whether it be for the kitchen or the bathroom. And I think that they should look great! I just found some flour sack towels at Walmart and I really like them because they are so cheap and I can dress them up any way I want to.

The best thing is that you can really do anything to these towels - dye them, paint them, stencil, screen print, iron on transfer, add embellishments buttons or ribbons, or cut and sew them into something else. The possibilities are endless REALLY!

Here is what I did using iron on transfer paper -

1. I took each towel (they come in a package of 5 at Walmart). I folded them in half and sewed the edges together so they became two-ply and closer to the size of a kitchen or bath hand towel. (this is completely optional)


2. I then went online and found some free printable graphics (graphics fairy is a great site to check out). At this point its up to you what you want the end product to look like, but I changed the color and altered the images a little in paint shop.


3. Once you have the images that you want - make sure to do a mirror image or t-shirt image and print them out on your transfer paper (there are two kinds of transfer paper one for inkjet printers and one for lazer printers make sure you get the right kind).


4. Cut out each image (you can leave a little around the edges or use an xacto knife).


5. Arrange the images the way that you like them with the printed side down and iron on.

The image on the left is ironed on, the image on the right is the printed image on the transfer paper


I hope this has inspired you to run out and get crafty with some flour sack towels.
Here are some links for other ideas for flour sack towels

http://www.thecountrychiccottage.net/2011/01/diy-vintage-flour-sack.html
http://www.alwaysinwonder.com/2012/02/painted-ombre-flour-sack-towels.html
http://accordingtocarey.com/tag/flour-sack-towels/

Thursday, June 27, 2013

Pinned It / Tried It - Cinnamon Roll Pancakes

Number 2 Pencil Blog


Cinnamon Roll Sour Cream Pancakes Recipe:

Cinnamon Sugar Filling

4 tablespoons of melted butter
1/4 cup of firmly packed dark brown sugar
2 tablespoons of sugar
1 teaspoon of cinnamon

Melt 4 tablespoons of butter in the microwave and add to mixing bowl. Then add 1/4 cup of dark brown sugar (I used golden brown sugar), 2 tablespoons of white sugar and 1 teaspoon of ground cinnamon and stir together.

Fold a quart size plastic baggie over a small cup, that way you can easily pour the cinnamon sugar mixture into the baggie. Close the baggie well and set aside to cool. To speed up the process a little I put my bag of cinnamon sugar goodness into the fridge


 Sour Cream Pancakes

1 cup of all-purpose flour
3 tablespoons of sugar
2 teaspoons of baking powder
1/2 teaspoon baking soda
1/2 teaspoon of kosher salt
1 cup of sour cream
1/4 cup of milk
4 tablespoons of melted butter
1 egg, lightly beaten
I made traditional Bisquick pancakes


Let the pancakes set up on the griddle for about 2 minutes, then it is time to add the cinnamon sugar swirl. Snip just a small corner of your cinnamon sugar baggie, push the tip of your baggie into the batter, and carefully swirl the mixture into the pancake batter. Don’t just swirl the mixture on top of the pancake, it needs to be in the batter to make the signature cinnamon roll look. (I don't think I added the cinnamon sugar soon enough and didn't get it into the pancake enough). Try not to get too close to the edge of the pancakes with the swirl, or the cinnamon sugar mixture will run off.

Once the pancakes are cooked, about 7 minutes on the first side, and 5 on the second side, remove them with a large spatula sprayed with non-stick cooking spray. Turn them onto the plate swirl side up. Work quickly when removing the pancakes, once the cinnamon sugar mixture cools on your spatula, the pancakes will start to stick.

These pancakes did make a mess of my griddle, but I have a clean up trick that makes cleaning up a snap. While your griddle is still hot take a wet paper towel and using your spatula wipe down the griddle. The steam from the wet paper towel loosens up all the mess and wipes it away.


These pancakes were very good, but I was expecting more of the gritty traditional cinnamon roll filling. I will definitely make these again in the future. Follow my blog with Bloglovin

Tuesday, June 25, 2013

Simple Patriotic Wreath

I have found that I am more successful with seasonal decorating when my projects are more simple. I found some cute cupcake papers at JoAnn Fabric. I had plans to make a wreath fully covered in the papers, but that was just unrealistic with the time that I had (at least I'm honest).
 
This tutorial can be adapted by adding as many cupcake papers as you like and by changing the wreath from a grapevine to a foam base.
 
 234x60 Fourth of July Sale Plus 10% OFF Coupon
 
Supplies:
Wire
Wire cutters
Scissors
Beads
Cupcake Papers -  I used the regular size and the candy cup size
Jute / ribbon
Wreath - foam, grapevine, cardboard anything will work
 
 
I started by cutting down some of the regular sized papers so when I layered them you could see all three colors - red, white, blue.
 
Next I cut 3 inch lengths of wire (you will need I length for each flower)
I made a small loop at one end and slide on a bead
 

Take each wire with the bead and poke it through the center of your layered cupcake papers (you can put as many layers together as you like I did three - 1 red, 1 blue, and 1 white. I alternated the colors on each flower, but that's optional.


After you have all your flowers made then you need to decide how you want to place them. I did a grouping of three regular size for the bottom of my wreath and three small for the top.


To attach the flowers on a grapevine wreath simply feed the wire through the grapevines and secure it in the back by wrapping the wire around the vine.


To finish off the wreath add a jute hanger and a ribbon bow. (I hung my wreath from a vintage hanger and slid a flag behind the wreath just to dress it up.)


Tuesday, June 18, 2013

Blogs - What do you read?

Blogs - Why do you read?


In an attempt to stay current, gain more readers, and also keep yall excited please answer the following. These apply to all the blogs you follow including mine.

Why do you read?

Do you like a more written post or picture filled post?

Are you a fan of posts that are personal stories? Tutorials? Recipes?

Do you enjoy reading long posts or short ones?

Kids related crafts and activities or things more for yourself?

Informational? Relating to the world of crafting, diy, flea marketing, etc.


I want to get my new blog calendar together so that I can get writing and create posts that I enjoy and that everyone wants to read. Without your help I can only post what I THINK you will like, shoot me a comment or message so I can write posts made just for YOU!!!!

Friday, June 14, 2013

Free Blogging Class from Blogelina

Blogging is super fun, but I know all of us struggle sometimes especially when getting started. I just found out about Blogelina.com through Bloggymoms.com.

Blogelina has great online classes and an awesome affiliate program!


Blogelina is once again offering her very popular 4-week blogging class — for FREE! This online class will be held in July 2013.

If you sign up for this free class, here’s what you’ll get: A class manual – packed with 60 pages of information that will help take the overwhelming out of starting your own blog 4 weekly online class sessions where you can ask your questions and get personalized feedback A FREE year of web hosting. Blueprints, step-by-step tutorials, networking with other bloggers - Everything you need to grow your blog. Save yourself a lot of time, trouble, and money – learn from my own experiences what to do and not to do. Go here to sign up for the FREE 4-week blogging class.

Wednesday, June 5, 2013

Wordless Wednesday - Pillowcase Dresses

Now that the weather is warming up here in Northern California I am thinking about making pillowcases dresses for my daughter.
Here are some cute pinter-ation.

 
kerryaxley.blogspot.com


                                rebekalambert.com


Saturday, June 1, 2013

Flea Marketing Tips - Part 1


Going to the Flea Market can sometimes be a little overwhelming. Here are the hot items that might give you some ideas for things to look for.


1. Doors 
2. Windows 
3. Bird cages 
4. Ladders 
5. Quilts 
6. Linens 
7. Frames 
8. Jars 
9. Wicker and wooden baskets 
10. Scales 
11. Vintage kitchen items 
12. Silver 
13. Vintage jewelry 
14. Vintage dishes 
15. Chandeliers 
16. Chandelier crystals 
17. Watering cans 
18. Galvanized items 
19. Vintage ice chests and toolboxes 
20. Keys 
21. Buttons 
22. Suitcases and trunks 
23. Globes 
24. Maps 
25. Postcards
26. Oil Lamps
27. Hankies
28. Antique Cameras
29.Crates
30. Vintage Glass Bottles
31. Tins / Canisters
32. Antique Books
33. Sheet Music
34. Ephemera / paper ephemera
35. Architectural salvage
36. Industrial Items
37. Garden Items / Planters and Decor
38. Flower Frogs
39. Vintage trims, ribbons, lace, and wood spools
40. Vintage Toys and Games
41. Chairs
42. Small Tables
43. Mannequins / dress forms
44. Storage items - canisters, cans, bottles, crates, boxes, etc
45. Printers Tray
46. Printing Letters / Stamps
47. Vintage Fabric
48. Vintage Pillowcases and sheets
49. Pyrex / Vintage Dishware
50. Owls


Here are a few items that I also look for:

Vintage Christmas décor
Ornaments
Mercury glass
Yard sticks
Aluminum Christmas trees
Measuring Tapes
Organizational items / furniture
Rulers
Kids Stuff / Flash Cards

Friday, May 24, 2013

Quick and Easy DIY Jewelry

This post is in connection with my Just Can't Seem to Craft.

I was finally able to create something distraction free - well almost distraction free (aka a 2 year old and her shenanigans).


I made these sterling silver and shell earrings and a silver and turquoise beaded bar necklace.


Pinned It / Tried It -


Pinned It / Tried it - Jello & Canned Pineapple


Charm and Poise

Drain juice from a can of Sliced Pineapple
Replace with Jello made with 1/2 of the water required on pkg.
Chill until set.
Run hot water on can sides & bottom to loosen.
Cut bottom from can to punch mold out.
Cut between pineapple slices & serve.

I used sugar free strawberry Jello. I did not read the directions about using 1/2 the water so mine was a fail (as far as the form and slicing) it still tasted delicious.


Here is my finished product:


I am definitely going to try this again and actually follow the directions :)


Wednesday, May 22, 2013

Just Can't Seem to Craft

Over the past two weeks every time I sit down to craft I just can't seem to get into it. I think its like writers block, so in an attempt to get my butt in gear I am going to randomly choose an inspiration piece from one of my pinterest boards.

I am going to pick something from my Jewelry Board. I want a jewelry piece that wouldn't take too long and get the creative juices flowing.

Here are the ideas I am going to pick from:
Via Tumblr

Wine Cork Charms from Lavender Clouds


Heart Pendant Necklace from Everyday Life at Leisure


I will post some pictures of the process and the reveal of which piece I chose as my inspiration.

Check out the quick and easy jewelry I ended up making: http://house-of-diy.blogspot.com/2013/05/quick-and-easy-diy-jewelry.html

Monday, May 13, 2013

Getting Connected


I never thought starting a new blog would require so much time. I guess I never considered how much my blog and social media have grown over the past year.

I have been hard at work getting my facebook, twitter, instagram, and blog all connected. I wanted to make sure that I am following all the great blogs and the people that run them through all forms of social media.


If you stop by and I haven't posted in a couple days its because I am hard at work making this blog the best it can be.

Friday, May 10, 2013

Quick and Easy Mom Fashion


I am always trying to pinpoint my fashion point of view...what little one I have between fighting with my teen daughter, changing diapers, and keeping up on my household duties. (I am hoping you moms out there can relate, that some days I am lucky to just get out of my pjs let alone look fashionable)

I picked up a great khaki jacket at the Goodwill for about 6.99. The great think about a jacket/ blazer is it can be worn through multiple seasons by simply changing the layers - long sleeve for winter, short sleeve or tank top for warmer weather.

NOTE: When I want to step out of my fashion comfort zone I choose to go to the Goodwill or a thrift store because I can get pieces for under $10.00, and if I don't like it I don't feel bad scraping it.

I paired the jacket with a long sleeve solid colored shirt and jeans. To dress this outfit up a added a scarf bow, large earrings, boots, and brown / gold makeup. Pops of color and patterns are easy to add when done with smaller items i.e. scarf, jewelry, purse, belt or shoes.


Wednesday, April 24, 2013

Wordless Wednesday - Window LOVE


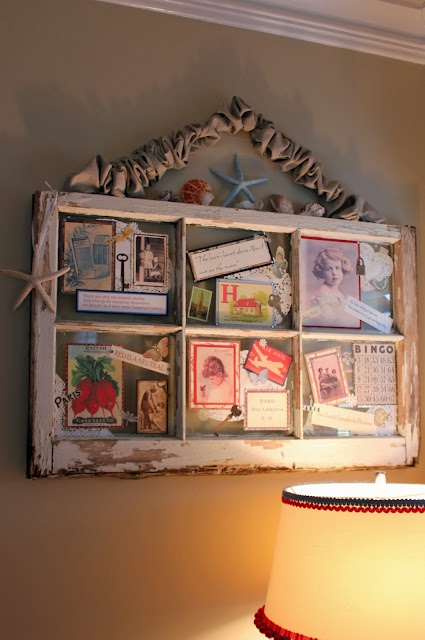
I love vintage windows and they can be used for so many things.
 
                                                          The Bramble Berry Cottage


Etsy.com